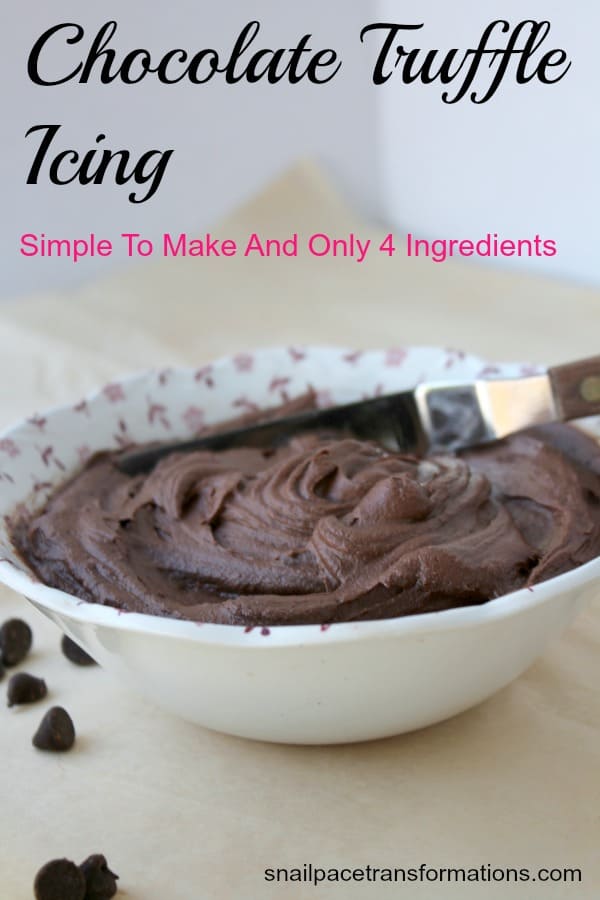
Chocolate Truffle Icing: Only 4 Ingredients & Super Simple To Make
Do you think you can’t make chocolate icing at home? You are wrong! With just four ingredients and a few simple icing success secrets, you can make amazing chocolate truffle icing that will make you say, “Forget the baked goods. I am eating all this chocolate icing with a spoon!”
(Links in this post are affiliate links. I will be compensated when you make a purchase by clicking those links. See my disclosure page for more information)
This recipe is what I use to top my mom’s chocolate wacky cake recipe.
It is actually a recipe for chocolate truffles that I found when I first got married almost 17 years ago. I just adapted it by adding enough milk to make it spreadable.
Chocolate Truffle Icing: Only 4 Ingredients & Super Simple To Make
One day, I was desperate for a simple-to-make chocolate icing recipe that would be just right to top the wacky cake, and out of that need, chocolate truffle icing was born.
Ingredients Needed For Chocolate Truffle Icing:
- Butter
- Icing sugar
- Cocoa Powder
- Milk (preferably 2% or higher in fat)
Kitchen Tools Needed For Chocolate Truffle Icing:
- A hand mixer—I splurged on this one after burning out the motors of several different brands mixing cookie dough and have now owned it for several years. I LOVE it.
- Spatula—great for getting every last bit of icing out of the bowl and applying it to cakes and cupcakes. I purchased a silicone set of Spatulas similar to this one and am impressed with them. I love that since they are molded from one piece of silicone, I don’t have to deal with the problem of having the plastic head fall off the wooden handle.
- Small Metal Icing Spatula–-for icing cakes and cupcakes.
(psst….you can earn Amazon gift cards to purchase these products through Amazon Swagbucks )
Instructions For Making Homemade Chocolate Icing
- My biggest tip for successful icing-making is to take your butter out to soften several hours before. Do not try softening it in the microwave; that never works. You will end up with slightly melted butter, and that will not make good icing at all.
- Cut the butter up into small pieces and beat it with your mixer.
- Add the cocoa powder and blend it into the butter with your hand mixer.
- Next, add about 1/3 of the powdered sugar (the amounts are in the recipe below) with one tablespoon of milk. Start with your mixer on low and beat the mixture well. As the powdered sugar mixes in, you can increase your mixing speed.
- When that is beaten, repeat that twice more to add all the cocoa powder, powdered sugar, and up to 3 tbsp of milk (read tips before adding all of the milk. You may need less depending on what you are icing).
Tips For Making Chocolate Truffle Icing
This recipe is more of an art than an exact science. You have to know when you have reached that perfect spreadable consistency. But don’t worry if it is too runny; add more sugar; if it is too stiff, add more milk. I add a tablespoon of milk and then continue one tablespoon at a time until I get it to the consistency I want. Usually, it takes the same amount of milk as my plain icing recipe, which is 2 to 3 tablespoons.
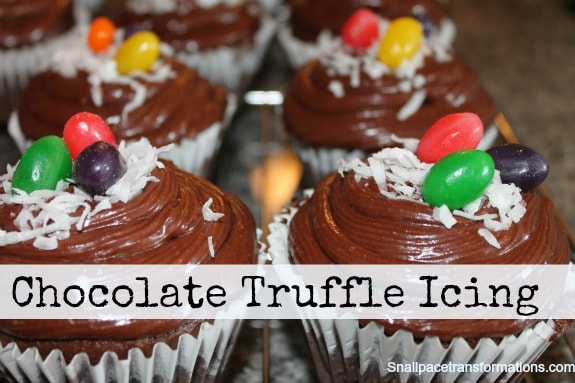
If you want to use this recipe to top cupcakes, I suggest using a little less milk so that it stays a bit on the stiff side. It will be easier to swirl up the sides of the cupcake that way.
For icing, a cake you can make is a bit smoother so that it spreads easier. It requires a bit of work to get the texture just right for what you want to ice, but it is oh-so-worth it for the incredible chocolate taste it adds to anything it tops.
For more instructions, jump over to my family’s recipe for plain icing.
More Quick And Simple Chocolate Recipes:
- 3-Minute Chocolate Fudge: No Candy Thermometer Needed
- No-Bake Chocolate Cookies With Coconut And Raisins
- 3 Ingredient Hot Cocoa: Recipe For One Mug Full
Ingredients
Method
- Make sure you take your butter out to soften several hours before.
- (Do not try softening it in the microwave, that never works. You end up with slightly melted butter and that will not make good icing at all.)
- Cut the butter up into small pieces and beat it with your mixer.
- Next, add in about 1/3 of the powdered sugar (amounts in the recipe below) with 1 tablespoon of milk. Starting with your mixer on low beat the mixture well. As the powdered sugar mixes in you can turn up your mixing speed.
- When that is beat repeat that twice more so that you have added all the powdered sugar and 3 tbsp of milk.
- At this point icing gets a bit personal, as in you have to decide how soft you like it for spreading purposes.
- If you want a more spreadable icing you may want to add in more milk a teaspoon at a time until you get it to the right spreadability.
- If you want to put it on cupcakes you might want to stop at 3 tablespoons of milk, and may need to add in a bit more icing sugar if it is not stiff enough to stay piled on top of the cupcakes like you want it too.
- As I said in the blog post --icing thickness is really up to the individual and more of an art than a science. The best thing to do is add the milk slowly and a little at a time.