(Links in this post are affiliate links. I will be compensated when you make a purchase by clicking those links. See my disclosure page for more information)
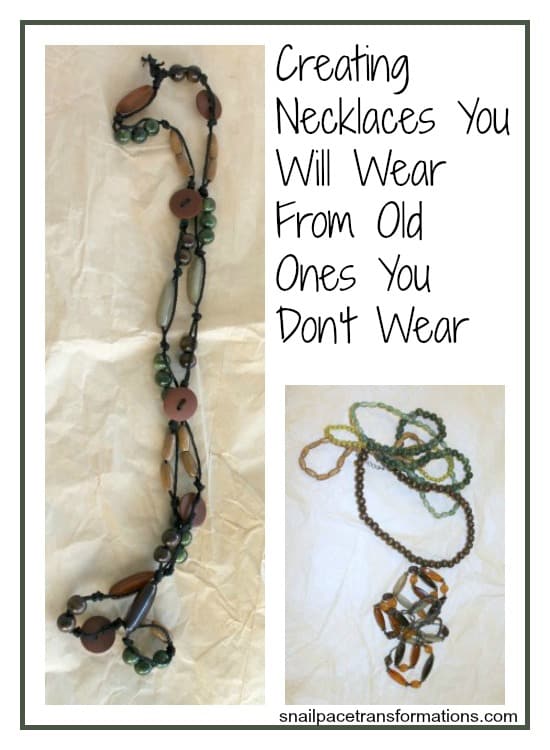
Last yard sale season I picked up two necklaces that I really loved the colors of. When I got them home however I discovered they did not lay nicely around the neck line of my shirts.
I loved the colors so much though that I kept them thinking perhaps somehow I could reuse the beads.This weekend, I was in a creative mood and decided to finally remake the two necklaces into one that would go with a new Anne Taylor sweater I found at Goodwill 2 weeks ago.
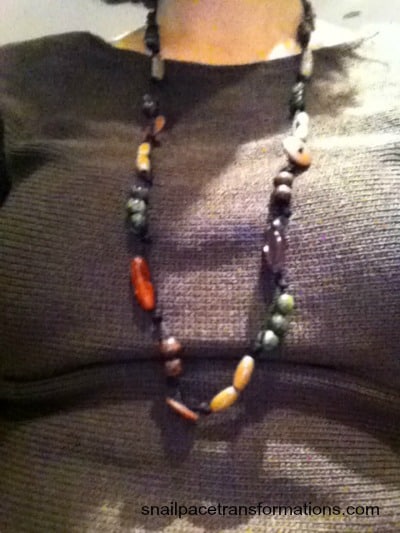 I wore them together Sunday for church (psst…I took this picture in the pew while waiting for the service to start, I promise I did not take it during the service). I think the two thrifty finds go together very well. I have enough beads leftover that I might make one more as a gift for someone.
 I used a necklace a friend made me for my birthday one year as a guide. As you can see it is similar colors. What can I say except that browns and greens look really good on me so I wear them a lot.
This necklace is threaded on very delicate crotchet yarn. Since my beads were bigger and I wanted a chunkier look I went out looking for a chunkier version of this yarn.
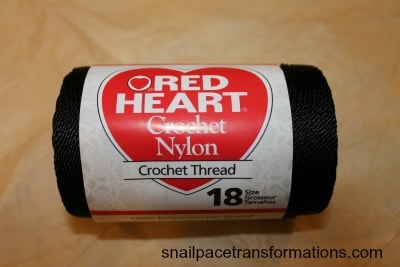 I found what I was looking for at my local Walmart. This whole ball cost $3.97. I found a similar yarn made specifically for beading in the beading department for the same price but it would have only made one necklace where as I will get dozens of necklaces out of this, or use it up on other projects of my own choosing.
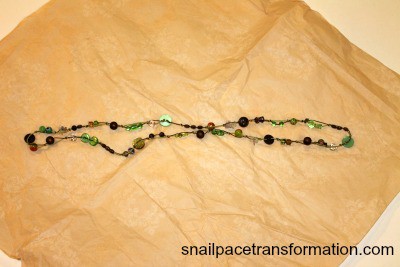
 I started the project by first carefully snipping open the yard sale purchased necklaces above a plastic container to catch all the beads.
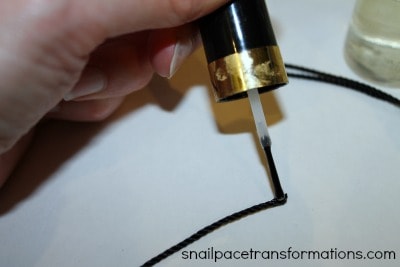 I then cut 2 pieces of yarn to the length I wanted the necklace plus 1/2 more, since I was making knots which would take up yarn as I went along. To keep the ends from raveling I used a bit of clear nail polish on them and dried them with a blow dryer (had I been more patient I would have cut the yarn one night and let the nail polish dry until I had time to work on crafts the next night….but….I was not patient)
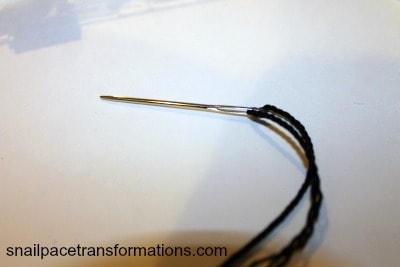 Since I was not patient one end did unravel due to the nail polish not being as hardened as it could be. My solution was to use a needle that fit through the beads. This worked really well and actually made it easier to string the beads. Next time I might use a needle on each string with a dab of dried colored nail polish on each end ( a different color for each one) so I can tell the cords apart to make it easier to string one side and then the other (you will see what I mean later on).
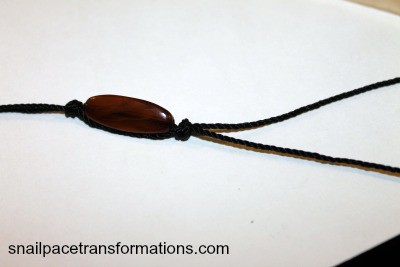 I put a slip knot in one end of the two pieces of yarn. Then strung a bead on one string and then tied another slip knot. The next beads went on the opposite piece of yarn followed by another slip knot and this pattern repeated itself until it was done and I tied the two ends together with a double knot and trimmed the ends.
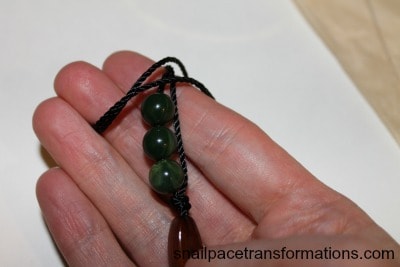 Here is a picture of my fingers about to make a slip knot to give you a better idea of what I did. This necklace went together very fast once I decided on a pattern. I did not lay out my pattern, but next time I think I will as the whole time I was making the necklace I was fearful I was going to run out of a certain type of bead. I didn’t though and as I said above I have enough leftover to make another one making this necklace redo very thrifty!
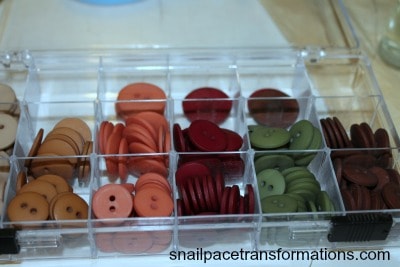 Oh, and one last thing, you might notice my necklace has some buttons in it that were not in either of the two necklaces I took apart to make it. These buttons I purchased years ago when I use to crochet purses for my daughter and her friends. I also used some of them in my button headbands, so technically they didn’t cost me anything to add in and I really thought they added something. However, if you decided to make over your necklaces like I did don’t feel like you have to go out and add buttons in, just keep things thrifty and use what you have.
Become A Snail Pacer
Receive a weekly newsletter full of tips for making life changes at a realistic pace.
Leave a Reply