Snail Pace Transformations

Transforming Life Inch by Inch

  • Home
  • Disclosure
    • Privacy Policy
  • My Story
    • Books Read In 2022
    • Let’s Chat!
  • Work At Home
    • Reselling
    • Point Programs
    • Blogging
  • My Book
  • 52 Resources For Stretching Your Money
  • My Shop

Creating a Light Box Effect For Under $2

October 9, 2013 By Victoria 19 Comments

Share
Pin
Tweet
Share

Last updated on December 21st, 2022 at 01:30 pm

Create a light box effect for brighter photos with simple inexpensive items you can find at your local dollar store.

creating a light box effect for under $2

Creating a Light Box Effect For Under $2

(Links in this post are affiliate links. I will be compensated when you make a purchase by clicking those links. See my disclosure page for more information)

After reading How to Blog For Profit: Without Losing Your Soul  I know that if I want my blog to expand farther I need to produce better photos.

I was blessed to be able to purchase a great camera (I have an older version of this one) and am slowly learning the ins and outs of it. I will admit I am still not brave enough to switch over to manual mode but I am hoping to eventually figure it out with the help of a few different ebooks I have waiting to read in my Kindle App.

For now, though I just wanted to make the backdrop of my photos look as good as the “wow” pins I see on Pinterest. I showed my husband the type of photos I wanted to create and we both decided they must have light boxes.

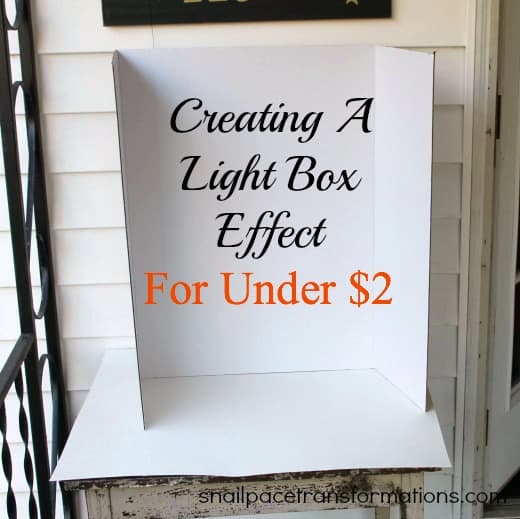
My husband told me that he currently did not have time to help me make a light box but for now, why didn’t I purchase 2 pieces of white foam board from Dollar Tree tape them together and drag them outside to the table I was currently using to photograph all my items on (our house does not have good light so I provide entertainment for the neighbors by taking pictures of food and other random items outside in all kinds of temperatures).

When I got to Dollar Tree my daughter gave me an even better idea, she pointed out that science fair boards were white and that you could get two pieces of white poster board for just $1. So for $1.50 plus tax my light box effect was born.

Just last night I tried it out on a popular post of mine “Simplest Fudge Ever”

Here is my sad indoor photo that was taken with my iPod touch

simplest fudge ever

Here is the new photo that was taken with my new camera and poster board

simplest fudge ever only 2 ingredients

I  think you will agree with me that the change is dramatic!

Please note: This post was written in 2013 and updated in 2020. Since I wrote the original post I have learned so much more about photography  (thanks in part to skillshare). These older photos kind of make me cringe. I know I could do better now using the same  $2 lightbox if I were to redo the photos. But then I don’t think the post would be as genuine.

Smartphone cameras have vastly advanced since this post was first published and now think you can achieve great pictures for Instagram and Pinterest with your smartphone (no need for an expensive camera) but this lightbox tip still creates better photos than indoor lighting with no backdrop.  I still use this tip to create great photos –with different boards since this post of course! 

For More Blogging On A Shoestring Ideas Read:

  • How To Monetize Your New Blog: Make Money From Day One
  • More Than 100 Free Blogging Tools That Will Help You Grow Your Blog
  • So You Want To Start A Blog? Or Grow The One You Have?

If you are a fellow mom trying to grow your blog into a steady income source without letting it take over your life join my Snail Pacing Bloggers Facebook Group.

Want To Start A Blog But Are Overwhelmed By What To Do First? Try This FREE Class

3 Steps to Start That Blog You've Been Dreaming Of!

Get access to this 1-hour video class for FREE that will  teach you

  • 1 Habit You Should Begin TODAY for a successful blog tomorrow!
  • The KEY things you need to have in place to get your blog up and running.
  • Five simple ways you can make a part-time or full-time income from blogging!
  • Go here to sign up today.

Become A Snail Pacer

Receive a monthly newsletter full of tips for making life changes at a realistic pace.

Success! Now check your email to confirm your subscription.

There was an error submitting your subscription. Please try again.

We won't send you spam. Unsubscribe at any time. Powered by ConvertKit
Share
Pin
Tweet
Share

Filed Under: blogging

Comments

  1. [email protected] says

    October 9, 2013 at 8:15 pm

    Thanks for a GREAT tip! I’m no photographer – and can use all the help I can get. And, I DO love a bargain : )

    Reply
  2. Kay says

    October 9, 2013 at 8:54 pm

    Wow! Your new picture looks awesome.

    Reply
  3. Carrie says

    October 9, 2013 at 10:37 pm

    I’ve been trying to think of ways for better backgrounds too. Thanks! I may try this soon.
    Carrie

    Reply
  4. Brittany @ThePrudentPatron says

    October 10, 2013 at 7:57 am

    I love it! I struggle with this too. I usually take pictures on my son’s bed because it has the best light, but I love the idea of the science boards! I can’t believe that never occurred to me. Thanks!

    Reply
    • Victoria says

      October 10, 2013 at 8:14 am

      It never really occurred to me either. I really need to give my 11 year old daughter all the credit. She was the one who pointed out to me how well it would work.

      Reply
  5. Barb @ A Life in Balance says

    October 10, 2013 at 2:51 pm

    Wow! That is awesome! I read the same book, and felt inspired to push myself with my writing and photography. I’ve been using a sheet, but I’m just not happy with it. Plus I feel like it’s prone to getting stained.

    Thanks for linking up at Fabulously Frugal Thursday!

    Reply
    • Victoria says

      October 11, 2013 at 5:30 am

      I am sure the bottom board in my light box will get stained quickly too since I am not the neatest baker but the good thing is when it does it will just cost me .50 cents to replace.

      Reply
  6. lorraine williamson says

    October 10, 2013 at 7:25 pm

    I love your photos will follow the tips need help with the food photos can’t do anything about trying to photograph a siamese just have to catch him in the act. Following you now have a great day

    Reply
  7. Heather M says

    October 11, 2013 at 6:34 am

    LOVE this! This is the best frugal post I have read all week. I have needed a light box for quite a while. Dollar Tree here I come. Thanks for linking up for Fabulously Frugal Thursday.

    Reply
  8. Christina @ Keeping Home says

    October 11, 2013 at 7:52 am

    Thank you for this idea! Just what I needed–and within my budget.

    Reply
  9. Ruth @ Living Well Spending Less says

    October 11, 2013 at 10:37 am

    I love how you made your lightbox and so cheap too. The second photo is gorgeous. Pictures, especially for pinterest, are SO important and it’s wonderful that you are taking the steps to take better pictures. Way to go! Thanks for linking up to Thrifty Thursday.

    Reply
  10. Gabrielle says

    October 11, 2013 at 3:44 pm

    Great idea!!! I love this. So much easier than making a light box, which I just don’t have the time and patience for right now. Found you through Fellowship Fridays!

    Reply
  11. The Hill Hangout says

    October 14, 2013 at 10:27 am

    Genius! The lighting in our house is pitiful for photography, so I am always shooting photos on my back deck. Lighting is ALWAYS an issue for me, so this simple, cheap trick will be useful!

    Reply
  12. Stephanie @ Six Figures Under says

    October 17, 2013 at 11:40 am

    Love this idea!! My husband made me a light box with tissue paper once (it didn’t come with us when we moved across the country) to take pictures for my etsy shop. It couldn’t handle very big items to photograph and it didn’t collapse to store well.

    Reply
  13. Lila says

    May 14, 2014 at 11:40 pm

    I have one of these boards! I tried using the white side of my reflector as a background, but I need to reshoot my photo trying this method. Thanks for the tip!

    Reply
  14. Autumn says

    October 12, 2018 at 1:27 pm

    If you want to change up the bottom, (depending on how big your dish is) you could always grab a bigger sheet of scrapbook paper (or 2) to go underneath.

    Reply
    • Victoria says

      October 13, 2018 at 3:28 pm

      Great idea! Thanks for adding it.

      Reply

Trackbacks

  1. a says:
    October 15, 2013 at 10:49 am

    […] Mom {How to Get your Kids to Clean Their Room; Printable Checklist} 6. Snail Pace Transformations {$2 Lightbox Effect} 7. This Silly Girl’s Life {Garlic Cheese Muffins} 8. Living Chic on the Cheap {My 5 Favorite […]

    Reply
  2. Thrifty Thursday Link Party | Link Up Your Budget Friendly Blog Posts says:
    October 17, 2013 at 10:18 am

    […] Mom {How to Get your Kids to Clean Their Room; Printable Checklist} 6. Snail Pace Transformations {$2 Lightbox Effect} 7. This Silly Girl’s Life {Garlic Cheese Muffins} 8. Living Chic on the Cheap {My 5 Favorite […]

    Reply

Leave a Reply Cancel reply

Your email address will not be published. Required fields are marked *

Recipe Rating


Follow Snail Pace Transformations

  • Facebook
  • Pinterest

Looking for something?

Sign Up For My Newsletter

Success! Now check your email to confirm your subscription.

There was an error submitting your subscription. Please try again.

We won't send you spam. Unsubscribe at any time. Powered by ConvertKit

Hi, I'm Victoria

Welcome to the Snail Pace Transformations blog where I share my tips for improving finances and home management one small step at a time. Why small? Because small changes are more likely to transform your life.

My Book Thrifty & Thriving Available On Amazon

Recent Posts

  • A Simple & Quick Decluttering Plan For Busy People
  • 31 Fast & Easy Ways To Earn Extra Cash For Christmas
  • 29 Christmas Gift Ideas For People Who Love Their Kindle
  • The Best Ways To Make Christmas Extra Special On A Tiny Budget
Privacy Policy

Copyright © 2023 · Lifestyle Pro Child Theme On Genesis Framework · WordPress · Log in