Make Your Own Inexpensive Gratitude Journal
 I have been keeping a gratitude journal for almost 2 years now. I find it a great way to maintain a thankful spirit.
(Links in this post are affiliate links. I will be compensated when you make a purchase by clicking those links. See my disclosure page for more information)
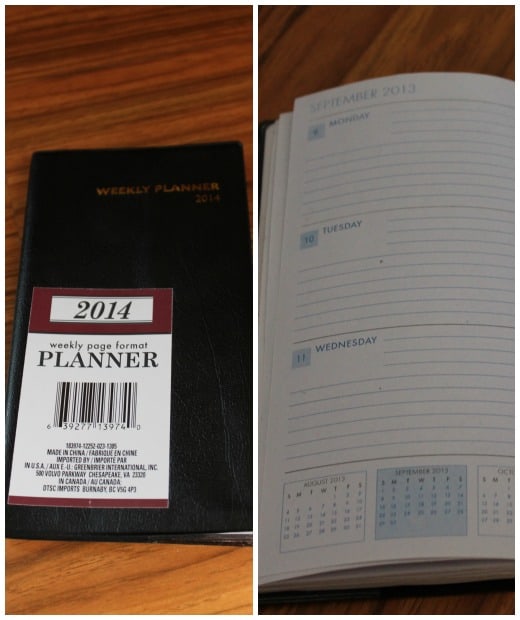
I use a simple $1 week at a glance planner found at my local Dollar Tree each year. I love that each day has just a few lines to jot down the things that happened that day that I am most thankful for.
I was perfectly happy with it until I saw Crystal’s gratitude journal and the envy fairy started to work her magic within me. My thrifty ways would not let the envy fairy spend more than the $1 I already spend on a gratitude journal so I let her talk me into altering the journals I already use.
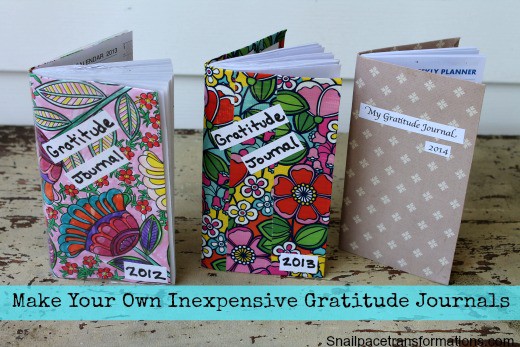
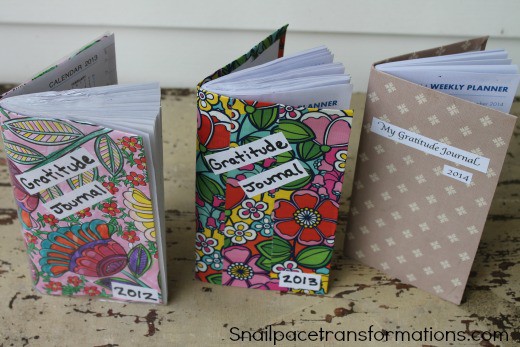
With a bit of thought I came up with three different ways to cover my gratitude journals from 2012, 2013, and the one I recently purchased for 2014
I am sharing their transformations with you here today so that you can quiet your own “envy fairy” or just start a really great habit of being intentionally thankful each and every day of the year in a stylish DIY gratitude journal.
If you are a lot more crafty than I am (which wouldn’t take much) you could make these as gifts for your loved ones as gifts this Christmas for very little money. Paired with a pen an inscription by you as to why you are thankful for them and I think you would have a great meaningful gift.
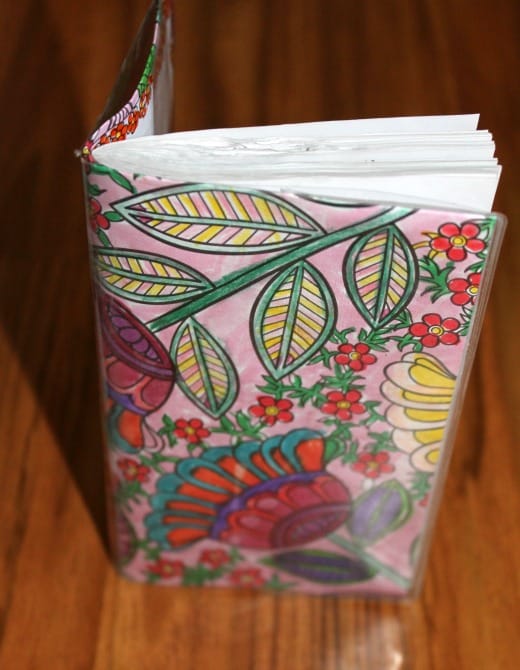
Here was my first attempt
 For this gratitude journal I used some scrap booking paper I had and cut it just slightly bigger than the calendar. I then added on printed out labels. I am happy with how plain and simple it looks but not so happy with the glue in the lower corner (what can I say I failed glue skills in preschool)say I failed glue skills in preschool)
")
For my second attempt I grabbed my current 2013 gratitude journal and some printed duct tape. I used a ruler to help cut each piece of tape to the same length. I suppose I could have done it so the pattern matched up like you do with wall paper but I am not that fussy. I could have also bought one of those duct tape sheets they now sell so that I would have had no seams but I wanted the duct tape for another craft so this was more thrifty.
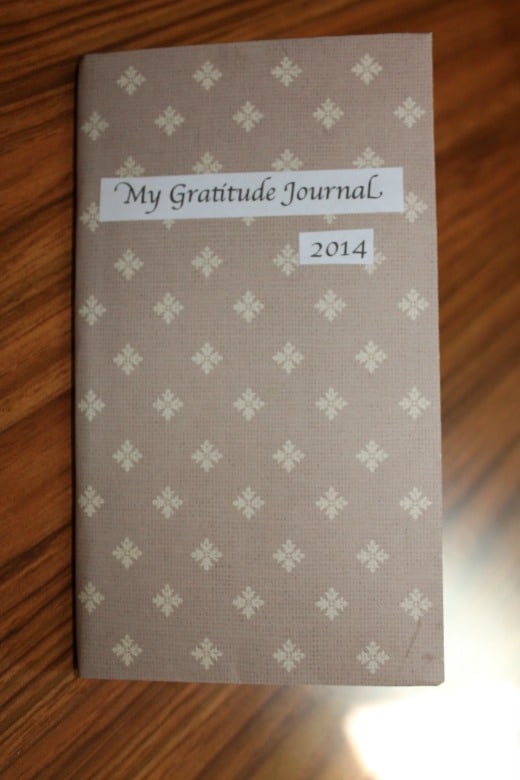
 For my third version I got a piece of my daughter’s art off the fridge and cut it to just bigger than the cover so that I could wrap it around the edges. This particular calendar I bought at Big Lots for $2 back in 2012 (yes I know I splurged and spent an extra dollar). What I liked about it is it came with a clear cover over the tacky cardboard one. The clear cover helps protect my daughter’s art piece.
I was thinking if you did not have children who produce mass amounts of art, you could also use a flyer from a concert you attended or a post card from where you went on vacation, basically anything that sparks thankful memories.
 In the end I think the envy fairy came up with some pretty good ideas of how to convert my thrifty $1 week at a glance calender slash ugly yet practical gratitude journal into something pretty, practical and still THRIFTY.
Here are a few tips I learned that will help you make your own
1. Cut the paper a bit larger than the cover
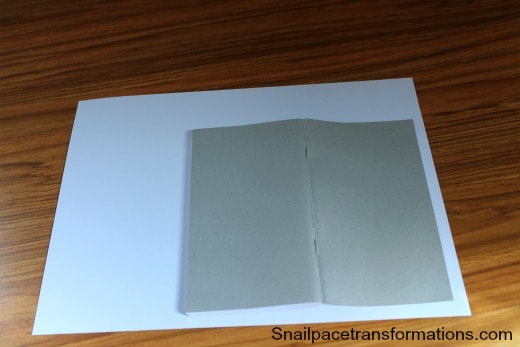
I did this by placing the gratitude journal open to the middle on the paper and created a quarter inch boarder around it. I then used a ruler to draw the two lines I needed for the side and the top.
2. How to work around the top and bottom of the cover
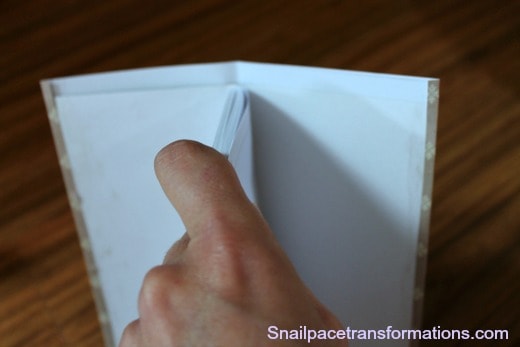
I grabbed all the pages in one hand and then gently worked the new cover over the old cover and between the pages.
3. A few tips for the duct tape version
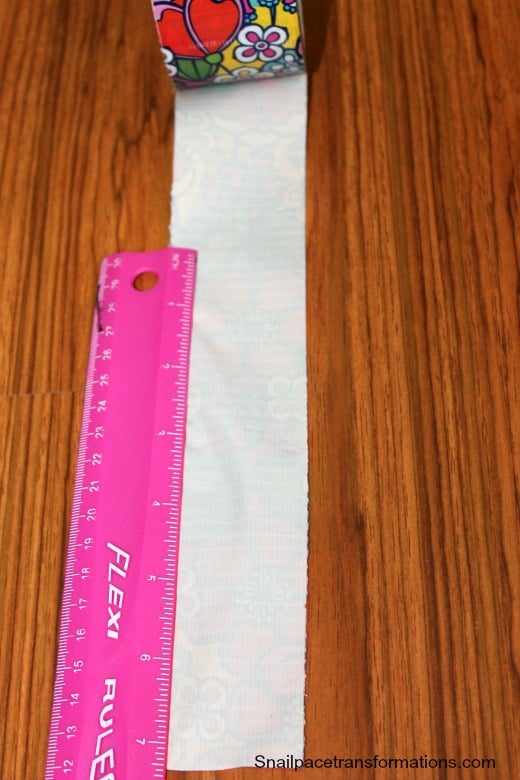 I used a ruler to help cut the tape to the same length each time. Measure the height of the book and then add on 1/2 inch which will allow for you to bend 1/4 of an inch around top and bottom. Also I worked in from each edge of the cover, two strips each and then did the middle strip down the spin over lapping on each side equal amounts. I suppose you could also do width ways if you wanted to.
These are just 3 ideas for covering a $1 week-at-a-glance calendar and making it a stylish gratitude journal. Take these pictures and use them as a jumping board to create one that is uniquely you or uniquely your loved one.