
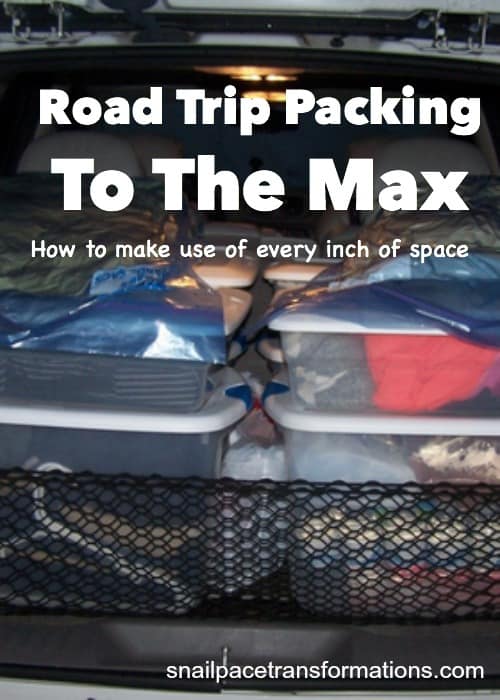
Road Trip Packing To The Max: How To Fit Everything In Your Vehicle For Road Trips
Our family of five recently went on a trip to Disney World. We decided to drive and not fly to save money. From our house to Disney is an 18-hour drive.
When I picked out my Trailblazer I thought more about my day to day life than once a year road trips. With that in mind, I opted out of the third row of seats. My hubby rarely drives with us and my son is old enough to occupy the front passenger seat, making the bench seat in the back very roomy for my two youngest children.
So when faced with the upcoming 2-day drive with all five of us in the vehicle, I had to think about how to maximize my trunk space as well as passenger space.
Here is how I made everything we needed for a two-week vacation for a family of five into the back of a modest-sized SUV.
How To Fit Everything In Your Vehicle For Road Trips
(Links in this post are affiliate links. I will be compensated when you make a purchase by clicking those links. See my disclosure page for more information)
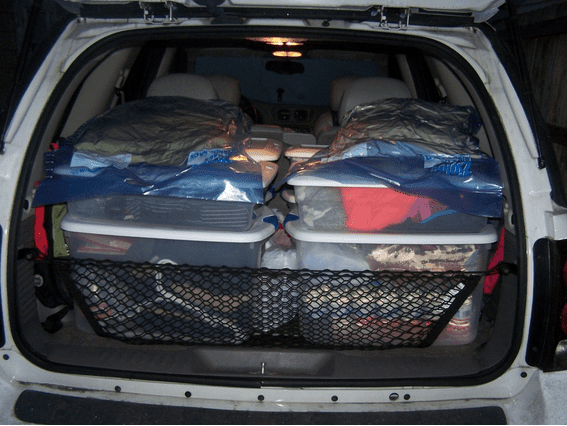
I used 4 big plastic totes and 4 smaller plastic totes as well as 2 XXL Ziploc bags. I always find that luggage doesn’t stack well, and therefore inefficient in maximizing space. The bins were also easier to access when we needed something at a rest stop.
To start, I carried out two totes to the vehicle, and made sure that they would fit, and figured out just how many I could fit and what configuration would work best.
Once I figured out exactly how many totes we could fit, and what size, I then went around the house emptying out totes we already had and putting them all in one central location of the house to begin packing.
Knowing exactly what would fit, really helped me decide what to bring and what not to bring.
I made sure to leave a little space in each bin to allow for purchases on the trip. Which was a good thing, because they were stuffed to capacity on the trip home.
All our belongings fit in these totes, our pillows went in these oversize Ziploc bags. Down the sides of the totes, I stuffed our 5 backpacks (we used regular school backpacks, but if I had to do it over these would have squished in a smaller space) and in the middle of the totes, I fit our 5 collapsible lunch coolers (similar in size to this one).
I also wanted to make sure that the kids had their favorite handheld electronics handy. I wanted these items to be out of the way of their feet and off their laps when not in use. My husband came up with the idea of slinging his work cooler over the headrest, and it worked great (here is a cooler similar to the one we have, perhaps a bit larger but very similar).
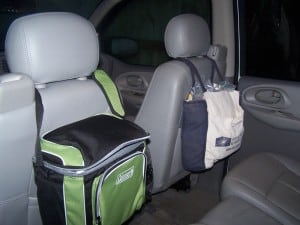
I then found a canvas bag that I could sling over the other headrest that held our first round of snacks and waters (here is a snack bag made specifically for hanging off a headrest in a vehicle).
It is not shown, but we placed my daughter’s portable DVD player in the middle of the two front seats and strapped its case to the front seat headrests as well.
This system worked amazingly well for us. We have decided that on our next road trip, we will change only one thing: We want to purchase one more cooler for the back of the other headrest, as the canvas bag hung down too low and got in the way of the children’s knees.
Another idea is to use a different packing cube color for each person inside the totes. This company sells affordable sets in a wide variety of sizes and colors. They sent me a set to try out and I like the quality and size variety.
How about you? Do you have any tips on packing the family vehicle to the max for a long road trip?
More Travel Tips
- How I maximize every inch of my carry-on luggage: You won’t believe how much I can get in one tiny bag.
- Screen-Free Ideas For Keeping The Kids Busy During Long Road Trips
- 10 Summer Road Trips To Take With Your Kids No Matter Where You Live

GetUpside: An App That Saves Us Money At The Gas Pump
1. GetUpside
GetUpside is an app that gives you cash back when you get gas. In our area my family is able to use this app at several different gas stations, saving anywhere from 1 cent per gallon to as much as 10 cents per gallon
The GetUpside app is simple to use; it takes less than a minute to find a gas station, claim the offer, and then enter the information needed to start processing the cash back. Generally, it takes less than 24 hours to receive your cash back in the “Cash Out” area of the app. You can opt to receive your cash out through PayPal, a mailed check, or a gift card (starting at $10).
Use my referral code YG5ZB during sign up and you will receive a one-time 15¢/gal bonus. Go here to sign up for GetUpside.
How To Turn Your Vehicle Into A Camper

10 Essential Items For Turning The Family Minivan Into A Camper
